Firm Up Your Cat's Ride with Sub-Frame Connectors
Long before I found out that the inner rocker rail was damaged, I noticed that the convertible would flex a lot more on uneven roads than the hardtop. One of the most often recommended fixes for this is to install sub-frame connectors. So while a lot of the flex problems were most likely due to the eroded floor pans and rotten rocker rails, I decided to go ahead and install sub-frame connectors.
Sub-frame connectors are either bolted or welded to the underside of the car. Up front they are connected to the end of the frame rail extension while at the rear they are connected to the rear frame rail, right behind the torque box. Installing them, particularly if they are being bolted in, isn't a complex task. The ones purchased for the vehicles shown here are the bolt-in type, but they are being welded in.
The toughest part of installing sub-frame connectors is access; Cars in general and definitely Cougars are just too low to get under the cars to install the connectors. The best option is a lift, but since very few folks have that option, let's just skip over that one. The next option is a rotisserie, but most of them require the car to be a stripped shell and since very few folks have a rotisserie or want to strip their cars down to a shell just to install sub-frame connectors, let's skip over that option also.
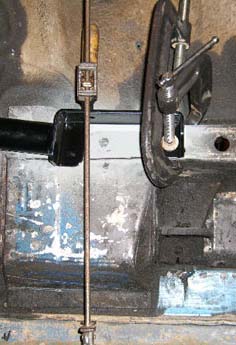
Third on the list is using a combination of ramps and jack stands, which is a doable option by most home mechanics. Drive the front tires onto the ramps (regular car ramps, not the low profile style), then carefully place the rear end of the vehicle on a set of jack stands. The preferred location for the rear stands is under the rear axle as that location distributes the weight of the car just like it is driven. A second option is to install the jack stands about 8" behind the rear torque boxes. They need to be behind the rubber plug that is in the side of the rail where the front eye bolt for the leaf spring is installed. Any farther forward than that may interfere with installing the sub-frame connector. Using ramps and stands under the axles is the recommended choice as both the ramps and stands are easy to buy and/or borrow from a friend. If ramps are unavailable, a second set of jack stands can be used instead. Place this set under the front torque boxes.
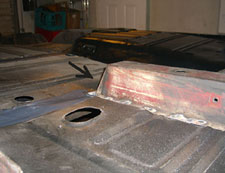
Once the car is safely up, test fit each sub-frame connector. While holding them in place, use a paint pen to mark where the connectors meet the frame rails. Once both sides are marked, use a putty knife or scraper to remove all the undercoating where the connectors contact the front and rear frame rails. As these connectors are being welded in place, all the paint in these areas also was removed. If the sub-frame connectors are being bolted in, instead of stripping the paint, a new layer of paint should be applied to cover the scratches and to protect the metal.
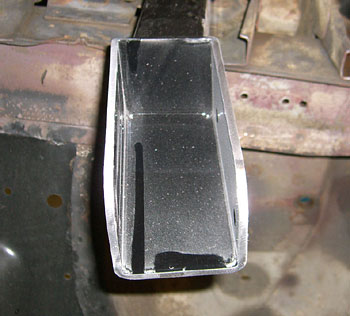
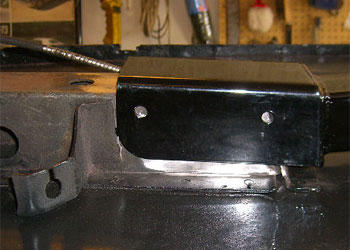
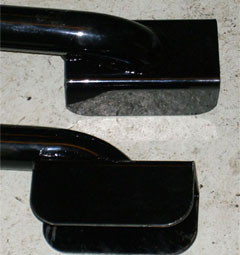
The sub-frame connectors will arrive either painted or powder coated. For those connectors being welded in, the coating has to be removed on the edges where it will be welded. This is the front part of a hardtop sub-frame connector (photo, left). The convertible sub-frame connectors have a different front connection, which is shown in the following photos.
While they should fit in place, occasionally trimming will be required. For convertibles, normally no cutting is involved. But for hardtops, there are two areas that may have to be trimmed.
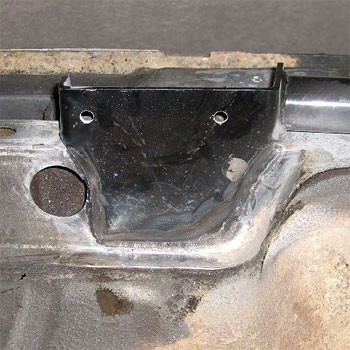
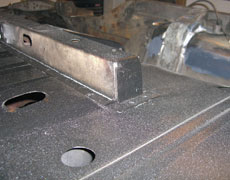 On a hardtop, the ends of the frame rail extension may have to be trimmed square (photo, left). The end plate (below left, arrow) has to be trimmed flush (below right) so the sub-frame connector will slide onto the end of the frame rail extension.
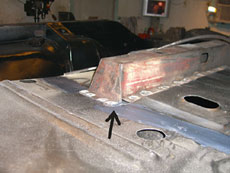
 Also with hardtops, the driver side sub-frame connector has to be trimmed to clear the emergency brake cable bracket. As shown on the photo on the left, the bracket prevents the sub-frame connector from sliding completely on the frame rail extension. The sub-frame connector has to be trimmed so it can slide on completed. In this case, the inside of the sub-frame connector was shaved to slide over the bracket (below), but a simpler solution is to just cut off the portion that interferes with the emergency brake bracket.
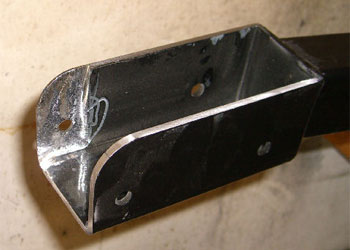
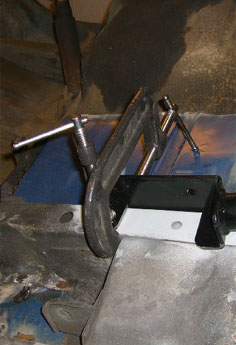
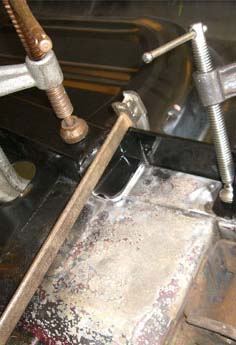
Once the sub-frame connectors are trimmed and successfully test fitted to the car, they can be permanently attached to the car. Put the sub-frame connector in place, clamping it first to the front of the car, then to the rear. If working alone, use a floor jack to hold the sub-frame connector in place while installing the clamps.
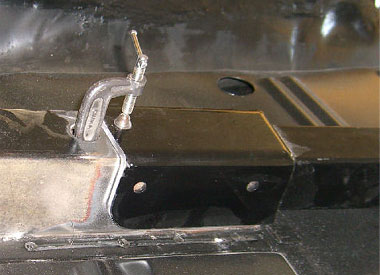
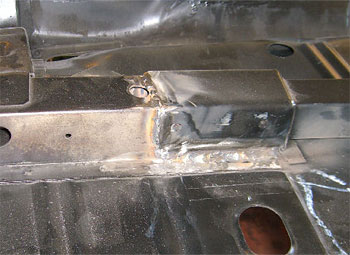
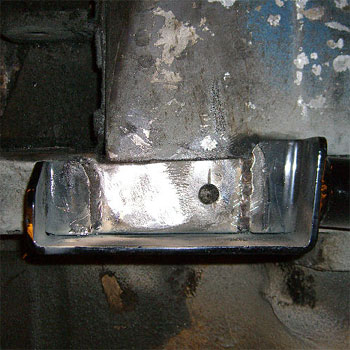
Once the front clamp is in place, check to ensure that the sub-frame connector is completely flat against the frame rail extension (left). It must be completely flush with the frame rail extension before it is bolted or welded in.
Before going any further, now is a good time to check the overall fit of the sub-frame connector. The rear end of the sub-frame connector should be touching or very near the rear frame rail. If either of the sub-frame connectors are more than 1/2" away from the rear frame rails, it may be a good idea to have the frame alignment checked before continuing.
If the sub-frame connector is going to be bolted in place, use a punch to dimple the frame rail extension through each of the four holes in the front of the sub-frame connector. If the sub-frame connector doesn't have holes in it, use the punch to dimple two spots on the side of the sub-frame connector. In the sub-frame connectors shown here, the hardtop sub-frame connectors already have holes drilled in them while the convertible versions do not have any holes drilled through the front ends and the two holes must be drilled completely through the sub-frame connector and the frame rail.
 These convertible sub-frame connectors (right) did not come with holes drilled in them. The front of the convertible sub-frame connectors are different from the hardtop ones shown earlier because they have to clear the floor pan supports that are unique to the convertible. To bolt these in, start drilling from one side and continue drilling until the bit comes out the other side of the sub-frame connector. Like the hardtop, use two bolts per side at the front.
These sub-frame connectors (below) on these two cars were welded in. The one on the left is the convertible model while the sub-frame connector on the right is the hardtop model.
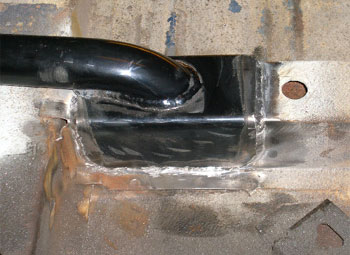
Install clamps at the rear to push the sub-frame connector flush against the rear frame rail. If the rails are being welded in place, weld the sub-frame connector to the rear frame rail at this time. If the rails are being bolted in, the process is a bit more complicated.
For those bolting the rails in place, it quickly becomes obvious that the holes in the rear of the sub-frame connectors are not for installation of the sub-frame connectors. The rear of the sub-frame connectors have to be drilled if they are going to be bolted in. Start by drilling two pilot holes through the sub-frame connector and one side of the frame rail. Because the sub-frame connector meets the rear frame rail at the rear torque box, the other side of the frame rail is completely obscured by the torque box, so the nut must be installed inside the frame rail. This is also why most sub-frame connectors are welded in.
The two pilot holes should be on the centerline of the frame rail and about 3/4" to 1" away from the ends of the sub-frame connector. Once the pilot holes are drilled, expand them in stages until they are 7/16". Place a large washer on a short bolt (about 1 1/2" long), insert it into the frame rail and into the hole closest to the front of the car. Put a large washer on the outside, followed by a lock washer and nut. Carefully insert a wrench into the hole, put it on the head of the bolt, and then tighten the nut with another wrench. Repeat the process for the second bolt and then repeat the entire process for the other sub-frame connector.
The rear side of the sub-frame connector is easier to weld in than to bolt in. A stubby wrench is somewhat easier to get into the opening in the frame rail, but not by much. The entire wrench has to be put into the frame rail before it can be installed on the bolt. A simpler solution would be to weld a bar to the head of the bolt to prevent it from spinning but if you had a welder you could just weld the sub-frame connector in and not fight getting the wrench in and out of the frame.

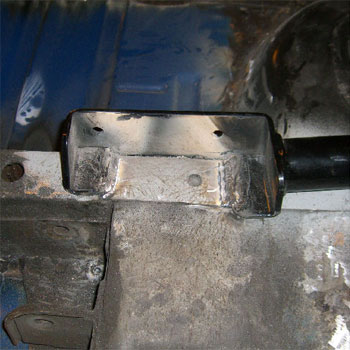
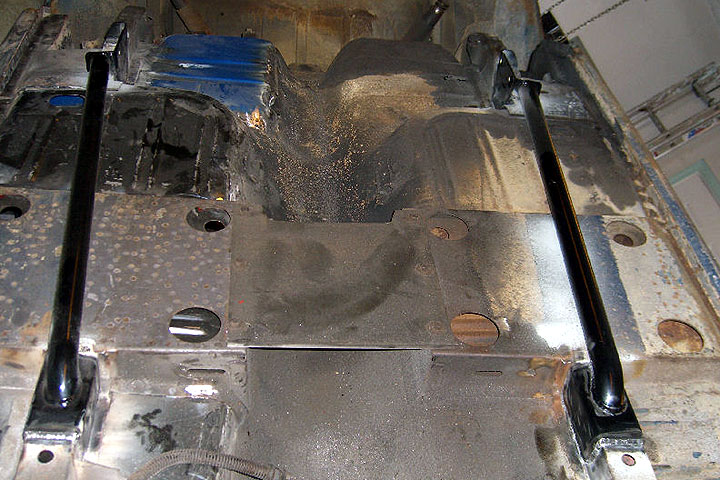
The next two photos show the completed installation for a hardtop. The underside of this hardtop has been painted and sprayed with an undercoating to protect the new floor pans and sub-frame connectors.
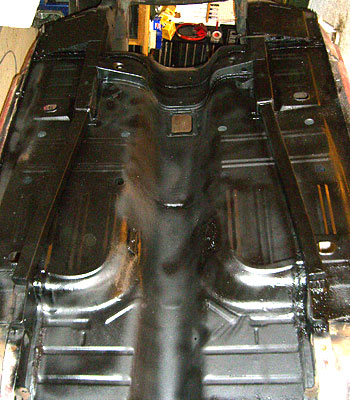
This is the completed installation for a convertible (below). Once the rest of the floor pan replacement was completed, the underside was also painted and undercoated.